Tag Archives: tart

Torta della Nonna (Italian Grandmother’s Ricotta Tart)

This is bad, and I mean real bad. Because it is too good—too good for New Year resolutions, too good to for a nondescript name like “Grandma’s Pie” and seriously too good to resist.

My 2011 began with such promise. After proclaiming it The Year of the rabbit Me, I made goals like “no more yogurt and cereal for dinner”, “cut back on sugar” and “say ‘yes’ to people and activities that make me happy and ‘no’ to those that don’t.  I am proud to say that breakfast for dinner is no longer a part of my daily life; I also started learning Japanese taiko drumming (this city is seriously the best; you can do/find everything here), I’m joining a choir again, I’m volunteering more in the arts, and I even left the city last weekend to visit a friend. Yes, I crossed to the other side of the bay (very Sex & The City girls go to the Hamptons—too funny since I’m not sure East Bay really counts as a weekend retreat.) Anyway, that’s all good stuff. But sugar. Sugar, sugar, sugar. No gold star for me there.

I knew what I was doing when I made the ricotta cheese; it was for this tart. Very bad. I also knew what I was doing when the next evening I decided to make oatmeal raisin cookies with coconut and walnuts. Again, very bad. (Recipe to follow shortly, of course). I’ve resolved to be better. Starting this week. After my cookie post I have a healthy oven-braised chicken recipe to share.

Now to the tart. It’s another recipe from someone’s grandma, so you know it’s been tried and tested by an Italian grandma somewhere. The pastry recipe I got from Mario Batali via the Food Network, though I’m not sure it’s really from his Nonna. And the filling recipe I took from Cook Almost Anything, and apparently, it’s from her mother. Regardless of origin, both are fantastic.

I went with Mario’s pastry recipe as it required way less fat (as in 3 tbsp each butter and olive oil vs almost 1 cup butter). It was simple to put together and when finished reminded me of pasta dough. As for the filling, I particularly liked the addition of semolina and lemon zest. I added raisins to the mix and the additional handful almonds for topping, but otherwise left the recipe alone. Assembly and baking are pretty standard. The tart will rise a bit while in the oven, especially in my case since my dough was still a bit raw after 35 minutes and I had to bake for an additional 10. One thing worth noting about the dough is that it is not supposed to be too golden, so don’t keep the pie in for too long waiting for the right color because you’ll just over-bake it and end up with a dry custard. In hindsight, I probably should have baked for only an extra 5 minutes as I think my custard would have been a smidgen creamier. Oh well, next time. Overall, though, I’m happy with my efforts! And by the way. I baked it Thursday, and it was gone Sunday night. (And yes, I did share 😛 )

Enjoy!

Torta della Nonna

printable recipe

INGREDIENTS

Pastry (adapted from Mario Batali recipe via Food Network)

2 cups all purpose flour

1 large egg plus 2 egg yolks

1/2 cup sugar

3 tbsp sweet butter plus 3 tbsp extra virgin olive oil, melted together

1/2 tsp vanilla extract

Filling (adapted from Cook Almost Anything)

1 1/4 cup whole milk

scant 1/2 cup semolina

1 lemon, zested and juiced

1 1/4 cups whole milk ricotta cheese

2 large eggs

1/2 cup sugar

1/2 cup raisins, optional

handful almond flakes, optional

confectioner’s sugar, optional

METHOD

  1. Preheat the oven to 350 F.

For the pastry

  1. To make the pastry, make a well in the flour, and place egg, yolks, sugar, butter and olive oil mixture in the center and proceed as you would with fresh pasta, i.e. bring flour in bit by bit until the liquid in the well is thick enough to bring together with your hand. Knead until the dough is smooth, then allow to rest 10 minutes.

For the Filling

  1. Heat the milk in a saucepan until just warm – rain in the semolina, stirring as you do to stop any lumps forming. Add the lemon zest and continue to stir until the mixture thickens and comes away from the side of the pan. Take it off the heat to cool.
  2. Push the ricotta through a fine sieve – this just helps to lighten the mixture. (Skipped this step…no fine sieve.) Place the sieved ricotta into a large bowl, add the eggs, sugar, lemon juice and cooled semolina mixture and using an electric mixer, beat until thoroughly mixed. If using, stir in the raisins now.
  3. Prepare the pastry case: Divide the dough into two—two-thirds for the base and one-third to form the top.
  4. On a well-floured surface, roll the larger piece out to line the base and sides of a loose-bottomed 20 cm/8 inch round pie pan. Make sure the pastry overhangs the lip to make joining the top easier.
  5. Pour the prepared filling into the case, smoothing it out to level the surface. It will rise when it cooks so don’t worry if it doesn’t reach the top of your pie case.
  6. Roll the smaller piece of pastry to form a circle a little larger than the pie pan.
  7. Brush the lip with a little milk before placing the pastry top – press down to make sure the dough sticks and then trim to size.
  8. Lightly brush the top with the milk, a sprinkle of sugar and, if using, a handful of almonds.
  9. Bake in a preheated 350 F for 30-35 minutes or until the pastry is golden and cooked through. (Mine needed 45 because after 35 the dough was still raw. To prevent burning, I covered the pie with a piece of foil with the center cut out.)
  10. Remove from the oven and let it cool for 5 minutes in the pan before removing it to a wire rack. At this point, you could dust the top generously with confectioner’s sugar. (I chose not to.)


Heavenly Pear Custard Kuchen

When I’m an old lady with a dozen little grandkids at my knees, this is what I will make for them. The original recipe is actually from someone’s grandma, so you know it’s good. I changed it ever so slightly and only because I didn’t have all the ingredients listed.

Normally I like to use my favorite sweet pastry crust recipe for pies, but in her post, Jules talks about the cookie-like crust and how it is really the star of the pie, so I went with hers. You know, I’m glad I did because the crust really is something special—it’s crumbly, crunchy and full of sugar and spice. The custard is lovely too, not too sweet and tastes incredible in combination with the pears. Instead of the called for whipping cream, I used evaporated milk because that’s all I had. I don’t think it affected the flavor or texture very much. One thing about the pears: it’s important that they are soft. If you use canned, then you don’t have to worry, but if you use fresh, be sure to poach them first. I happened to have two fresh pears at home already, which is why as part of my prep, I peeled, halved and cored them and then poached them in water flavored with lemon juice and a little sugar until soft yet still firm. The original actually called for canned plums, which I’m sure would also taste amazing, as would perhaps apple and peach.

Grandmas always make things with love, which I suspect is the real secret ingredient to this pie. So make it with a full heart and share it with the ones you love.

Enjoy!

Heavenly Pear Custard Kuchen (adapted from Jules Food)

printable recipe

INGREDIENTS

1/2 cup butter, at room temp.

1 cup sugar

1 1/4 cup all purpose flour, sifted

1/2 tsp salt

1/2 tsp cinnamon

1/2 tsp nutmeg

1/4 tsp baking powder

1 can pear halves or 2 fresh, which have been peeled, halved, cored and poached

1 cup whipping cream (I used evaporated milk)

1 large egg, at room temp.

METHOD

  1. Pre-heat oven to 375 F. Cream the butter and sugar together in a large mixing bowl.
  2. In a separate, smaller bowl, mix together flour, salt, cinnamon, nutmeg and baking powder.
  3. Add dry mixture to the creamed butter and sugar and blend together. Reserve one-third for later use. Press the remaining dough mix into a 9-inch tart or springform pan.
  4. Distribute the pear halves over the crust. Sprinkle the reserved dough mix evenly over the top. Bake at 375 F for 15 minutes.
  5. Whisk together the egg and whipping cream (or in my case, evaporated milk).
  6. After the first baking phase is finished, pour the custard over the pears and continue to bake until the top is golden and the custard is set, 25-30 minutes.

Blueberry Flan Tart


I wish I had the energy to write a better post about this cute tart. My mind, however, is consumed with too many things right now, leaving little room for more creative prose.

The blueberry flan filling is fresh and light from the yogurt and lemon zest. And 3 cups of blueberries? Oh, yes! As for the crust, though I liked it, it wasn’t as good as my favorite sweet tart dough recipe from TipTopf.

Enjoy!

Blueberry Flan Tart (adapted from The Three Cheeses)

INGREDIENTS

Crust:

scant 1 1/2 cups all purpose flour

1/2 cup sugar

1 1/2 tsp baking powder

generous 1/3 cup cold butter, diced

1 large egg

1 tsp vanilla

3 cups fresh or frozen blueberries (frozen may take longer to bake)

Filling:

2 tbsp all purpose flour (Forgot to add this, but turned out OK)

2 cups plain yogurt (I used non-fat, which was fine)

1 large egg

2/3 cup sugar

2 tsp lemon or lime zest, finely grated

1 tsp vanilla

pinch each of salt and vanilla

METHOD

  1. In bowl or with a food processor, combine crust ingredients until well mixed. Refrigerate for 30 minutes.
  2. Press doug somewhat firmly into a large (10″ or about 25 cm) cake tin or springform pan.
  3. Whisk or process together the filling ingredients until very smooth. Set aside.
  4. Sprinkle blueberries over top of the crust.
  5. Pour prepared filling over blueberries.
  6. Place cake pan in oven and bake at 375 F / 185 C for about 60 minutes, until nice and golden on the top. Serve warm or cool. (Joni, one of the Three Cheeses, suggests waiting overnight before cutting into, which is what I did. It was a good idea–the next day, the custard had firmed up even more and the crust had softened slightly, but was still nice and crumbly!)

Fruit Galette for Summer


Oregon. Winter is cold and rainy. Spring? Fall? Yup, cold and rainy. But summer, oh, summer–mildly hot, dry, and sunny, they are seriously the best. All you want to do is be outside, hiking, biking and swimming. And when you’re not doing that, you’re popping u-pick berries into your mouth and eating the sweetest peaches, plums and cherries, their juices dribbling down your chin.

I haven’t gone hiking yet (but am going tomorrow), but I’ve definitely eaten my fair share of summer fruit. What with the seemingly endless supply of nectarines, peaches, blueberries and grapes at my parents’ house right now and with the whole family being home, I decided to make a summer pie. Actually, I made a galette, i.e. a free-form pie, but which sounds way more shi shi in French 😀

I ended up making two galettes, each with a different filling (blueberry-nectarine and red grape), and relied on two recipes, one for the crust and blueberry-nectarine filling (via In Erika’s Kitchen) and one for the  grape filling (via Mac and Cheese). As for changes, for the crust, instead of using only all-purpose flour, I used half whole-wheat and half all-purpose. For the grape filling, I used lime zest instead of lemon (didn’t have any lemons at home).

Oh my goodness, there are no words to describe just how delicious each galette turned out. The crust was flaky, soft and so buttery. And the fillings—both amazing. I’d have to say I preferred the grape over the nectarine. Just a personal preference thing, I think.

Make this, make this, make this. And then tell me how it all turns out!

Enjoy!

Fruit Galettes for Summer: Blueberry-Nectarine and Grape (adapted from In Erika’s Kitchen and Mac and Cheese)

Makes two 8-inch galettes

INGREDIENTS

Crust

2 1/2 cups all purpose flour (I used 1 1/4 c. all purpose, 1 1/4 c. whole wheat)

1/2 tsp salt

2 tbsp raw cane sugar

2 sticks (1/2 lb.) unsalted butter, frozen and cut into small cubes (I grated with a cheese grater.)

1/4 cup ice water

1 large egg

2 tsp milk

sugar, for sprinkling

Blueberry-Nectarine Filling

3 cups thinly sliced nectarines

1 cup blueberries (I only had frozen at home.)

1/8 cup cornstarch

1/4 cup raw cane sugar

Grape Filling

4 cups grapes (I used red.)

1/2-3/4 cup raw cane sugar, depending on the sweetness of the grapes

the zest of 1 lemon (I used lime.)

2 tbsp cornstarch

METHOD

Crust

  1. Place the flour, salt, and 2 Tbsp sugar in the food processor and give it a spin to combine. Open the processor and sprinkle the bits of frozen butter over the flour mixture. Pulse five or six times, or until the whole thing inside looks like wet sand. (If doing by hand, combine flour, salt and sugar in a mixing bowl. Then, grate the frozen butter into the bowl and gently rub ingredients together with your fingers.)
  2. Sprinkle over about 1/4 cup of ice water and pulse again in your food processor is such that when you pinch some in your fingers it holds together. If necessary, continue adding small amounts of ice water and pulsing until it does this. (If doing by hand, form a small well in the flour-butter mixture and pour in the water. With a fork, gradually work the dry ingredients into the water. Then, with your hands, very briefly knead until a dough just begins to form.) Turn the dough out onto the counter, divide in half and shape into two disks. Wrap the disks in plastic wrap and refrigerate for at least an hour.

Filling

  1. Blueberry-Nectarine: Put the prepared blueberries and nectarines in a mixing bowl with 1/4 cup of the raw sugar and the cornstarch, and mix thoroughly. Let them sit in the sugar-cornstarch mixture at room temperature while the dough is chilling. This will help the fruit juice flow once you get the pie in the oven.
  2. Grape: Crush 3/4 cup of the grapes in a saucepan. Add remaining grapes, sugar, lemon zest, salt, and cornstarch to the crushed grapes. Heat fruit on stove, stirring occasionally until the juice has thickened. Allow to cool.

Assembly

  1. Pre-heat the oven to 450 deg. F. Roll out one of the dough disks into a rough circle. (Don’t worry if it’s not perfect.) Transfer the dough to baking pan lined with parchment paper or aluminum foil. Arrange the nectarines in a spiral fashion in the middle of the dough, leaving about a 2-inch wide edge around. Fold the edges up over the fruit, leaving the middle part of the arranged fruit exposed. Repeat the same process with the grape filling. Note: If there is excess juice, use a slotted spoon to transfer the fruit, in order to avoid making a big, wet mess. (Oops, I forgot to do this…my wet mess turned into baked solid caramel mess. Still looked and tasted good though!)
  2. Combine the egg and milk, and then with a pastry brush, brush over each galette. Sprinkle sugar over each. Bake for about 40 minutes or until the crust is golden. (I covered them with aluminum foil for the last 5 minutes of baking to avoid over-browning.)
  3. Remove from the oven and allow to cool at least 30 minutes before slicing.

Lúcuma Cream Tart

Today is the last day of my Spanish “class” (not sure whether 2 students qualifies as a class). I stumbled upon this free class by chance and it’s turned out to be one of the best things I’ve done all year. It’s close to work, it’s fun and is the motivation I need to improve my Spanish speaking skills.

Anyway, in celebration of our final class, I decided to bake a tart and also to introduce my teacher and classmate to my beloved lúcuma.

The recipe is one I found on Radishes and Rhubarb—straightforward, nothing complicated about it. I tweaked it slightly for my lúcuma version (the original is for banana cream pie).

I used my springform thinking I would get a prettier and easier- to-serve tart. However, removing the crust from the sides of the pan turned out to be not so easy. As you can see in the photos, I ended up with an uneven and crumbly crust—not nearly as pretty as I was hoping for. The taste, thank goodness, is exactly what I hoped and totally makes up for any imperfections in appearance.

The  custard is all about la lúcuma: dreamy creamy thick, sweet and caramelly. I could have strained the mixture, but chose not to—I really enjoy the starchy texture of lúcuma and wanted it to stand out. As for the chantilly cream (which is just whipped cream sweetened with sugar and vanilla), it’s smooth and light and is a good contrast in texture to the custard.


In case you are wondering WHERE outside of the Andes you can find lúcuma: here in San Francisco, I know of only one place. It’s a little market on Mission, between 20th and 21st, which sells the fruit in frozen puree form and costs about $5.00 for 16 oz. Other small markets nearby have frozen passion fruit, guava and guanabana, but no lúcuma. Maybe next time I’ll try a version with passion fruit.

Enjoy!

Lúcuma Cream Tart (adapted from here via Radishes and Rhubarb)

Crust

1 1/2 cups crushed graham crackers

1/4 cup sugar

1/3 cup butter, melted

Custard

3/4 cup sugar

1/4 cup cornstarch

2 cups whole milk (I’m sure low-fat would work too)

1 cup lúcuma puree

4 egg yolks

1 tablespoon butter

1 teaspoon vanilla

2 bananas sliced

Chantilly Cream

1/2 cup whipping cream

2 tablespoons sugar

1 teaspoon vanilla

METHOD

For the crust:

  1. In a small bowl, stir together the melted butter, sugar and graham cracker crumbs until the crumbs are moistened and the mixture begins to clump together.  Pour the mixture into the bottom of your pie plate and, using your hand, press the crumb mixture to evenly coat the bottom of the pan and up the sides. Set aside.

For the custard:

  1. In a medium saucepan, combine sugar and cornstarch.  Stir in the milk. Cook over medium high heat, stirring constantly until the mixture is thickened and bubbly. Reduce heat to medium low and cook and stir 2 minutes more. Remove from heat.
  2. In a small bowl, lightly beat your egg yolks and then stir in the lúcuma puree.
  3. Whisking constantly, slowly add 1 cup of your warm milk mixture to the yolk and lúcuma mix.  This will temper the yolks to bring them slowly up to the temperature of the milk so that you do not create scrambled eggs. Pour into the remaining milk mixture in your saucepan. Cook and stir over medium low heat for two minutes more to thicken the custard.
  4. Remove from heat and stir in the vanilla extract and tablespoon of butter. If desired, you can strain the custard through a fine sieve to ensure it is smooth and there is no cooked egg in the mixture.

Assembly:

  1. Cover the bottom of your prepared crust with the banana slices and pour the custard over top.  Smooth the top with a spatula and cover with plastic wrap.  Place in the fridge for 6-8 hours to allow the custard to set and the tart to cool completely. You can prepare the tart the night before if you wish.

For the Chantilly Cream:

  1. In a stand mixer or with a handmixer on high speed, beat the cream until soft peaks form.  Add the sugar and vanilla and beat about 1 minute more until firm peaks form.  Right before serving the tart, spread the top with the whipped cream and garnish with banana slices.

Taste Testing

My friend Elizabeth is a brilliant chef in the making. And as it is her dream to one day open her own Peruvian restaurant, she’s decided to hold monthly dinners to test-run dishes and drinks for friends. Taste testing? I’m happy to lend my taste-buds to the cause! (^_^)

Last week was the first of the dinners. My favorite (surprise, surprise) was the lucuma cheesecake. Elizabeth gave me the recipe, which I hope to try soon (lucuma’s already in the freezer 😛 )!

The Menu


Steamed Mussles with Pico de Gallo


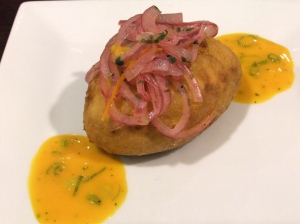
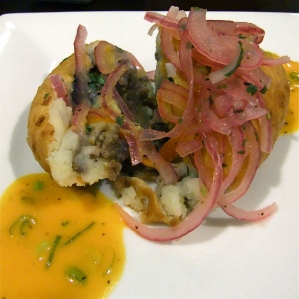
Fried Potato Croquette Filled with Sweet Ground Beef and

Topped with an Onion Salsa and Fresh Yellow Chili Sauce

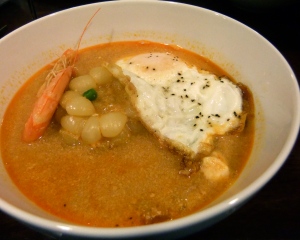
Peruvian-style Creamy Seafood Chowder

Lucuma Cheesecake Topped with Bittersweet Chocolate Sauce and Served with Lucuma Ice Cream


Feelin’ Fine French Pear Tart

I can’t explain why, but lately I just feel like celebrating—celebrating Spring, family, and my peaceful life. And I have chosen to show my gratitude the best way I know how: by baking.

I couldn’t wait to get home yesterday and make this French pear tart. It’s another Dorie masterpiece: elegant pear fans baked into a rich almond cream sitting atop a light, buttery crust. (Oh my goodness, I’m almost drooling over my own words.)

This may look complicated to make, but really it isn’t. I was pleasantly surprised at how uncomplicated it actually was to put everything together. The only adjustment I made to the recipe was to use a sweet pastry dough recipe from my Swiss TipTopf cookbook. The thing I love most about this dough is that I can do it by hand. Maybe it’s just me, but I love the feeling of cold butter and flour rubbing between my fingertips. For once, it’s actually a good thing to have cold hands (besides the whole “cold hands, warm heart” thing :P)—the butter doesn’t melt when I mix it into the flour.

Apart from the dough, I followed everything Dorie said to do. You know, it really does pay off to the follow directions and to measure exactly (and I was exact down to the gram). I don’t know why my pears are so brown. I’m not too upset about it because the taste more than made up for the slightly odd appearance. The golden crust is flaky and crisp, the pears are tender (but not mushy) and the almond cream—infused with sweet pear juice—is so incredibly smoooooth.

So will I be making this again? Oh, yes! What a way to celebrate all the good things in life!

Enjoy!

French Pear Tart (adapted from TipTopf and Dorie Greenspan’s recipe from Baking From My Home to Yours)

Makes one 26 cm springform tart

Sweet Tart Pastry (Muerbeteig)

200 g all purpose flour

1/2 tsp salt

100 g very cold unsalted butter, diced

2-3 tsp evaporated cane sugar

zest of 1/2 an organic lemon, grated

1 egg, at room temp. , whisked

2 tbsp cold water

Almond Cream

3 tbsp unsalted butter, at room temp.

150 g evaporated cane sugar

150 g ground almonds

1 large egg

1 tsp flour

1 tsp cornstarch

1 tsp vanilla extract

Tart

3 pears

METHOD

Sweet Tart Pastry

  1. In a medium mixing bowl, whisk together flour and salt. Add the butter and with your fingertips, gently rub flour and butter together until evenly combined.
  2. Mix in the sugar and grated lemon zest.
  3. Make a well in the dry mixture. Pour the egg and water into the well and with a fork, very quickly whisk the flour into the egg (working from the outside in). Once the dough starts forming, use your hands to gently pat it into a ball. Wrap the dough in plastic wrap and refrigerate for 30 minutes. (Or you can press the dough into the springform first—I put a plastic sandwich bag on my hand to do this, in order to avoid sticking and overhandling—and then chill.)
  4. While the dough is chilling, pre-heat the oven to 428 F (220 C).
  5. Fit a piece of tin foil tightly against the dough. Bake for 15-20 minutes on the center rack. Once finished baking, carefully remove the foil. If the crust has puffed up, use the back of a spoon to gently push it back down.

Almond Cream

  1. Put the butter and sugar in the workbowl of a food processor and process until the mixture is smooth and satiny. Add the ground almonds and continue to process until well blended.
  2. Add the flour and cornstarch, process, and then add the egg.  Process for about 15 seconds more, or until the almond cream is homogeneous. Add the rum or vanilla and process just to blend.

If you prefer, you can make the cream in a mixer fitted with the whisk attachment or in a bowl with a rubber spatula.  In either case, the ingredients are added in the same order.  Scrape the almond cream into a container and either use it immediately or refrigerate it until firm, about 2 hours.

Assembly

  1. Center a rack in the oven and preheat the oven to 350 degrees F.  Have a lined baking sheet at the ready.
  2. If you are using fresh (unpoached) pears, peel them now.  If you are using poached or unpoached pears, cut them in half from blossom to stem and core them; rub the unpoached pears with lemon juice.  Whatever pears you have, make sure to pat them dry – really dry – so that their liquid won’t keep the almond cream from baking.
  3. Fill the baked crust with the almond cream, spreading it even with an offset metal icing spatula.
  4. Thinly slice each pear half crosswise, lift each half on a spatula, press down on the pear to fan it slightly and place it, wide-end toward the edge of the crust, over the almond cream.  The halves will form spokes.
  5. Put the crust on the lined baking sheet, slide the sheet into the oven and bake the tart 50 to 60 minutes, or until the almond cream puffs up around the pears and browns.  Transfer the tart to a rack to cool to just warm or to room temperature before unmolding.
  6. Right before serving, dust the tart with confectioners’ sugar.  If you prefer, prepare a glaze by bringing about 1/4 cup apple jelly and1/2 teaspoon water to the boil.  Brush the glaze over the surface of the tart.

Roasted Tomato, Basil and Goat Cheese Tart

Took this pic w/ my cell. I swear I have THE WORST camera karma. I forgot my camera charger--again! Will have it back this weekend, though (Thx, Guapo!)

I’m so excited to write today. It’s one of those dreamy Sunday afternoons here in the city. Sun, a cloudless sky and quiet on the street below. The cherry blossoms have also started budding and blooming right outside my apartment window. It is a day to be spent out of doors, which is exactly what I’ll be doing when I go on a walking tour of Victorian San Francisco.

But before I could do anything, I had to make this tart.

It is the kind of tart that comforts my little heart and puts all thoughts to rest. I simply read through the instructions and let my hands do the work. No over-thinking, no stressing. Just baking.

We had beautiful organic tomatoes and basil left over from Melita’s dinner party last week. It would have been a shame to let them just sit there. So I rescued them. I came across this Roasted Red Pepper and Goat Cheese Tart on Lisa is Cooking a few months ago, which in a google search led me to Nick Malgieri’s recipe. The dough is olive oil based, which intrigued me. And the ingredients list for the filling is short—and also very flexible—which is even more interesting. Each ingredient’s flavor will be distinct and intense in its own way. Also, you can completely change the character of the tart by using a different cheese and/or roasted veggies.

I hope you enjoy this tart as much as I did. Happy Superbowl Sunday!

Roasted Tomato and Goat Cheese Tart (adapted from Nick Malgierie’s The Modern Baker)

Makes one 10 to 11-inch tart

Olive Oil Dough

1 1/2 cups all purpose flour

1/2 tsp sugar

1/2 tsp salt

1/2 tsp baking powder

1/4 cup olive oil

1 large egg

1 large egg yolk

2-3 tbsp water

Roasted Tomatoes

4 large tomatoes, cut into eighths

4 cloves garlic, unpeeled

olive oil

salt and pepper

Tart Filling & Egg Mixture

10 oz mild goat cheese, crumbled

1 large handful basil, cut into thin strips

6 large eggs

salt and pepper

METHOD

Roasted Tomatoes

  1. Pre-heat the oven to 375 F. Place the prepped tomatoes and garlic cloves onto a baking tray. Drizzle olive oil on top and then sprinkle over the salt and pepper. Bake for 50-60 minutes.
  2. Transfer the tomatoes to a small bowl and allow to cool completely. Discard the garlic (I suppose you could use it if you like).

Dough

  1. Combine the flour, sugar, salt and baking powder in the bowl of a food processor fitted with the metal blade. Pulse several times to mix. (I did this sans food processor.)
  2. Add the oil, egg, egg yolk and water. Pulse repeatedly until the dough forms a shaggy ball. Don’t over-mix or the oil might separate out of the dough and make it impossible to handle later on. If the dough seems dry and not about to form a ball, add water a 1/2 tsp at a time until it does. (I also did this all by hand. I made a well in the flour, whisked together the egg, egg yolk, oil and water in the well and then with a fork gradually mixed the liquids and flour mixture together.)
  3. Invert the dough onto a floured surface. Press the dough into a disk without folding it over on itself. Wrap and chill for up to 3 days.

For the Tart

  1. When you are ready to bake the tart, set a baking rack in the lowest level of the oven and pre-heat to 375 F.
  2. Roll the dough on a floured surface and then line your tart pan with it, trimming away the excess dough at the top rim. (I don’t like adding even more flour to the dough—it makes a mess and also changes the dough. Instead, I roll the dough out between 2 pieces of plastic wrap. No mess, no sticking and an easy transfer from counter to tart pan.)
  3. Sprinkle the tart crust with the goat cheese. Cover the cheese with the roasted tomatoes, slightly overlapping, followed by the basil.
  4. Whisk the eggs with the salt (not too much; the cheese is salty enough) and pepper. Pour the mixture into the tart crust to uniformly cover the tomatoes.
  5. Bake the tart until the filling is set and well colored and the crust is baked through, ca. 30 minutes. (Mine needed 35 min.) Then cool on a rack. Serve at room temperature.